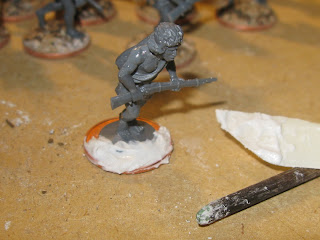
I know most people have their own way of doing this but, as I was texturing the bases on the Beja units this morning, I thought I'd explain my method, with a get out clause for teaching you to suck eggs.
1. Mix up the base texturing gunk in a small batch, otherwise you'll have loads left over:
70% filler (I use stuff called Bartoline Ready To Use Instant Filler, as I've found it to be the best)
20% Artists Acrylic Paste (this helps to bind it together)
10% PVA Wood Glue (go easy but the stickier the better)
If you want, you can also add some cheap earth brown acrylic paint to colour the mix at this stage (a 50:50 combination of raw umber and burnt sienna is a good all round shade to use)
2. Slap it all over the bases, in this case 1p coins, using a plastic spatula thing, which you can get from art shops for use with DAS clay and so on. It's a bit like icing a cake, so work around the base in a circle to cover the edges. Don't forget to cover over the figure base with filler and wipe around the edge of the coin with a finger to wipe off any excess.
3. Dunk the base in a mixture of sand and fine grit, shaking off any excess over the box. I find that a swirling motion in the sand helps to get a good coating over the base. You can give the figure a tap on the inside edge of the box to knock off any loose bits.
4. Using a wooden stick with an angle cut in the top or similar, tamp down the sand and grit into the mixture so that it is firmly bedded in. You can also remove any loose bits of sand or grit that have attached themselves to feet or legs (I have also cleaned up his face!)
5. Put the figure aside to dry. It usually takes about half an hour or so due to the PVA and acrylic paste helping to speed up the process. To be on the safe side, give it an hour before you slap on any paint.
Job done.
I then spray undercoat the whole figure in a basecoat of Halfords Ultra Matt Camouflage Brown, which is why I haven't bothered to stain the mix with brown acrylic paint this time round.


No comments:
Post a Comment